使用现有模型进行推理
本文将展示如何使用以下API:
list_models: 列举 MMPretrain 中所有可用模型名称get_model: 通过模型名称或模型配置文件获取模型inference_model: 使用与模型相对应任务的推理器进行推理。主要用作快速 展示。如需配置进阶用法,还需要直接使用下列推理器。推理器:
ImageClassificationInferencer: 对给定图像执行图像分类。ImageRetrievalInferencer: 从给定的一系列图像中,检索与给定图像最相似的图像。ImageCaptionInferencer: 生成给定图像的一段描述。VisualQuestionAnsweringInferencer: 根据给定的图像回答问题。VisualGroundingInferencer: 根据一段描述,从给定图像中找到一个与描述对应的对象。TextToImageRetrievalInferencer: 从给定的一系列图像中,检索与给定文本最相似的图像。ImageToTextRetrievalInferencer: 从给定的一系列文本中,检索与给定图像最相似的文本。NLVRInferencer: 对给定的一对图像和一段文本进行自然语言视觉推理(NLVR 任务)。FeatureExtractor: 通过视觉主干网络从图像文件提取特征。
列举可用模型
列出 MMPreTrain 中的所有已支持的模型。
>>> from mmpretrain import list_models
>>> list_models()
['barlowtwins_resnet50_8xb256-coslr-300e_in1k',
 'beit-base-p16_beit-in21k-pre_3rdparty_in1k',
 ...]
list_models 支持 Unix 文件名风格的模式匹配,你可以使用 ** * ** 匹配任意字符。
>>> from mmpretrain import list_models
>>> list_models("*convnext-b*21k")
['convnext-base_3rdparty_in21k',
 'convnext-base_in21k-pre-3rdparty_in1k-384px',
 'convnext-base_in21k-pre_3rdparty_in1k']
你还可以使用推理器的 list_models 方法获取对应任务可用的所有模型。
>>> from mmpretrain import ImageCaptionInferencer
>>> ImageCaptionInferencer.list_models()
['blip-base_3rdparty_caption',
 'blip2-opt2.7b_3rdparty-zeroshot_caption',
 'flamingo_3rdparty-zeroshot_caption',
 'ofa-base_3rdparty-finetuned_caption']
获取模型
选定需要的模型后,你可以使用 get_model 获取特定模型。
>>> from mmpretrain import get_model

# 不加载预训练权重的模型
>>> model = get_model("convnext-base_in21k-pre_3rdparty_in1k")

# 加载默认的权重文件
>>> model = get_model("convnext-base_in21k-pre_3rdparty_in1k", pretrained=True)

# 加载制定的权重文件
>>> model = get_model("convnext-base_in21k-pre_3rdparty_in1k", pretrained="your_local_checkpoint_path")

# 指定额外的模型初始化参数,例如修改 head 中的 num_classes。
>>> model = get_model("convnext-base_in21k-pre_3rdparty_in1k", head=dict(num_classes=10))

# 另外一个例子:移除模型的 neck,head 模块,直接从 backbone 中的 stage 1, 2, 3 输出
>>> model_headless = get_model("resnet18_8xb32_in1k", head=None, neck=None, backbone=dict(out_indices=(1, 2, 3)))
获得的模型是一个通常的 PyTorch Module
>>> import torch
>>> from mmpretrain import get_model
>>> model = get_model('convnext-base_in21k-pre_3rdparty_in1k', pretrained=True)
>>> x = torch.rand((1, 3, 224, 224))
>>> y = model(x)
>>> print(type(y), y.shape)
<class 'torch.Tensor'> torch.Size([1, 1000])
在给定图像上进行推理
这里是一个例子,我们将使用 ResNet-50 预训练模型对给定的 图像 进行分类。
>>> from mmpretrain import inference_model
>>> image = 'https://github.com/open-mmlab/mmpretrain/raw/main/demo/demo.JPEG'
>>> # 如果你没有图形界面,请设置 `show=False`
>>> result = inference_model('resnet50_8xb32_in1k', image, show=True)
>>> print(result['pred_class'])
sea snake
上述 inference_model 接口可以快速进行模型推理,但它每次调用都需要重新初始化模型,也无法进行多个样本的推理。
因此我们需要使用推理器来进行多次调用。
>>> from mmpretrain import ImageClassificationInferencer
>>> image = 'https://github.com/open-mmlab/mmpretrain/raw/main/demo/demo.JPEG'
>>> inferencer = ImageClassificationInferencer('resnet50_8xb32_in1k')
>>> # 注意推理器的输出始终为一个结果列表,即使输入只有一个样本
>>> result = inferencer('https://github.com/open-mmlab/mmpretrain/raw/main/demo/demo.JPEG')[0]
>>> print(result['pred_class'])
sea snake
>>>
>>> # 你可以对多张图像进行批量推理
>>> image_list = ['demo/demo.JPEG', 'demo/bird.JPEG'] * 16
>>> results = inferencer(image_list, batch_size=8)
>>> print(len(results))
32
>>> print(results[1]['pred_class'])
house finch, linnet, Carpodacus mexicanus
通常,每个样本的结果都是一个字典。比如图像分类的结果是一个包含了 pred_label、pred_score、pred_scores、pred_class 等字段的字典:
{
    "pred_label": 65,
    "pred_score": 0.6649366617202759,
    "pred_class":"sea snake",
    "pred_scores": array([..., 0.6649366617202759, ...], dtype=float32)
}
你可以为推理器配置额外的参数,比如使用你自己的配置文件和权重文件,在 CUDA 上进行推理:
>>> from mmpretrain import ImageClassificationInferencer
>>> image = 'https://github.com/open-mmlab/mmpretrain/raw/main/demo/demo.JPEG'
>>> config = 'configs/resnet/resnet50_8xb32_in1k.py'
>>> checkpoint = 'https://download.openmmlab.com/mmclassification/v0/resnet/resnet50_8xb32_in1k_20210831-ea4938fc.pth'
>>> inferencer = ImageClassificationInferencer(model=config, pretrained=checkpoint, device='cuda')
>>> result = inferencer(image)[0]
>>> print(result['pred_class'])
sea snake
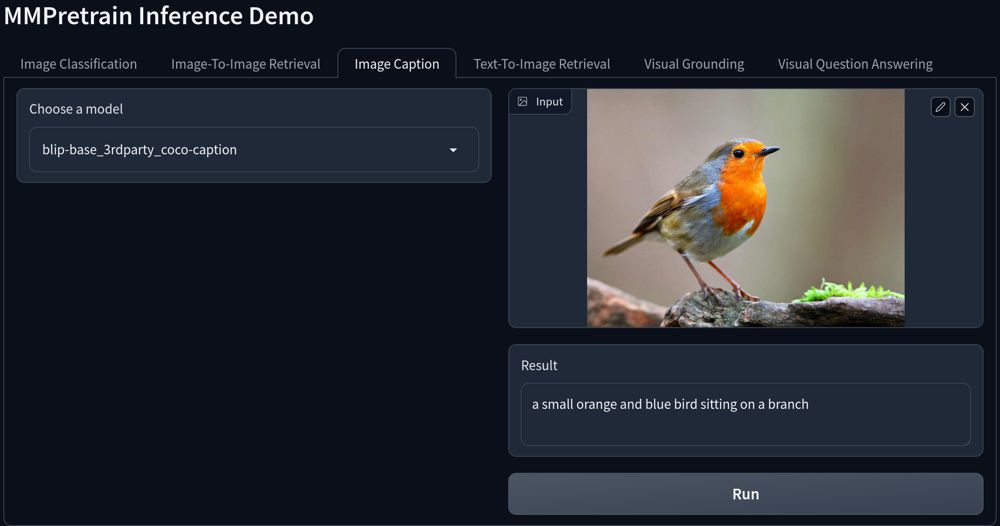
使用 Gradio 推理示例
我们还提供了一个基于 gradio 的推理示例,提供了 MMPretrain 所支持的所有任务的推理展示功能,你可以在 projects/gradio_demo/launch.py 找到这一例程。
请首先使用 pip install -U gradio 安装 gradio 库。
这里是界面效果预览:
从图像中提取特征
与 model.extract_feat 相比,FeatureExtractor 用于直接从图像文件中提取特征,而不是从一批张量中提取特征。简单说,model.extract_feat 的输入是 torch.Tensor,FeatureExtractor 的输入是图像。
>>> from mmpretrain import FeatureExtractor, get_model
>>> model = get_model('resnet50_8xb32_in1k', backbone=dict(out_indices=(0, 1, 2, 3)))
>>> extractor = FeatureExtractor(model)
>>> features = extractor('https://github.com/open-mmlab/mmpretrain/raw/main/demo/demo.JPEG')[0]
>>> features[0].shape, features[1].shape, features[2].shape, features[3].shape
(torch.Size([256]), torch.Size([512]), torch.Size([1024]), torch.Size([2048]))